Getting Started
Special Note: A new software package
for the FlySky CT6-A radio has been created by Stephano Grassi named
“Digital Radio” which is very easy to use and has
additional functionality. All of the setting information contained in
this manual can also be used with that software package. You can
download the Digital Radio package from http://www.sgr.info/usbradio
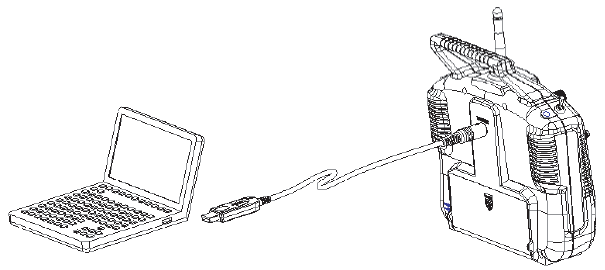
Start the application, and plug your (already installed and
configured USB interface) cable into the back of the transmitter.
Turn on the transmitter.
There are four sections to the main screen (Fig 1).
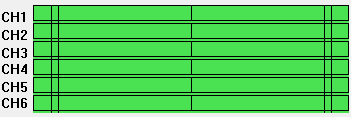
At the top is a graphical signal chart that represents the
six signals this radio provides.
Next section is the Software options (System Option)
Next section is the Signal configuration section (System
Setting)
Last section is the Switch configuration settings (Switch
Program)
Each of these sections and individual options will be described in
detail.
Connect the Radio to the Software

Fig 2
Verify that your radio is communicating with the software.
|
Not Communicating
|
Is Communicating
|
|

|

|
Fig
3
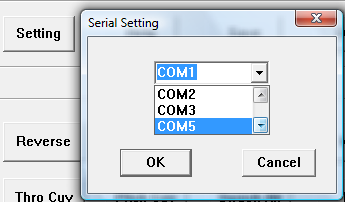
If your radio is not communicating to the software, you need to
click the Settings button in the System Option section. This
will display a serial port selection dialog where you can pick the
serial port your computer assigned to the USB cable. Typically this
will not be the first COM port, as any other installed computer
serial ports will consume COM1 and COM2. The Fly-Sky cable that comes
with your radio is a USB to Serial converter. There are two models of
this cable, and they are not marked. Some use the Prolific USB Chip,
and the later versions use a Silicon Labs Chip.
See http://www.mycoolheli.com/t6config.html
for links to the drivers.

Fig 4
If you do not know the correct serial port, try all of them until
your graphic signal chart displays with bars (Fig. 4). Wiggle the
control sticks on the radio to confirm the radio is communicating
(Fig.3). The bars will change if communications has been established.
*Note: It is a required to click the Get User button after
establishing communications with the radio. This forces the
T6Config.exe software to clear its memory and read the real settings
from the radio back into the software. Failure to do this may cause
issues or loss of configuration information when you make changes or
save the information to a file. The T6Config setup memory contains 67
bytes of binary information. The Get User button replaces the
software's 67 bytes of data with what it reads from the radio. If you
do not use the Get User button immediately after you begin
communicating with the radio, and you make some minor change, that
change along with whatever the software has in its own 67 byte
package is immediately sent to the radio replacing whatever it
originally had stored.
At this point, you have learned how to connect your radio to
the software, and force the software to read the settings in your
radio. Before moving on to the System Settings section, lets review
the remaining three buttons in this section.
Help button – typically just shows the vendor's
logo and any additional information the vendor would like to display
to you.
Save button – is used to save the radio settings
to a file for later use. Use this option frequently (preferably
changing names incrementally) so that if you mess something up, you
can reload the settings back into your radio. Note: This action
saves the values currently in memory of the software not the radio
itself. Before saving, it is a good practice to click the Get User
button to force the radio settings back into the software before
saving to a file.
Create a directory on your hard-drive for these setting
files. Keep them in one place. If you have multiple aircraft
models, then either name the files according to that model with
some incrementing value or other indication as to what that file is
for.
The dialog box allows you to select an existing file, or
create a new file. The “Open” button on this dialog is
used to save the file. The author of the program decided to use the
“Open” terminology instead of using the typical “OK”
or “SAVE“ terminology for this button.
Open button – is used to re-load a previously
saved configuration file from the hard-drive and load it into the
software and radio. Note: The settings in the file are immediately
passed into the radio overwriting all configuration settings.
At this point, you have learned how to save and load
configuration settings from files on your hard-drive.
Prev
Next - Terms