Tail and Gyro Setup
This is an area that confuses a lot of
new hobbyists. It is not complicated if you understand that the Gyro
is responsible for most of the work of keeping your helicopter
pointed in the direction you intend.
Two new terms to understand is the Gyro
Rate Mode, and Head Holding Mode (HH).
Rate mode will try to compensate for
unintended tail movement but does not remember the actual starting
position and therefore can not bring the tail back into the last
known heading. HH mode on the other hand remembers the last heading
(when the stick was last centered) and unless it is instructed to get
a new heading, it will aggressively attempt to bring the tail back to
the saved heading. The HH mode has a signal gain setting that is
controlled (the amount of gain) through channel 5 of the receiver.
The gain value sets the sensitivity of the HH mode. Too little gain,
and the margin (degrees) of off heading increases, too much gain, and
it will fight itself trying to maintain a heading (resulting in what
is called Tail Wag).
Note:Flying manually without any
gyro is possible, but incredibly difficult
even for experienced pilots. The gyro helps the pilot by comparing
the rudder signal you provide from the transmitter (“what you
want the helicopter to do”) with the actual detected motion of
the helicopter (“what it’s actually doing” or what
was done to it by environmental factors or inherent counter-forces of
rotary flight). So, if you told the helicopter to stay pointing
(center stick) in one direction and the gyro knows the helicopter is
actually rotating anyway because of wind or main blade torque, it
will add or subtract from the rudder servo signal until the
helicopter actually stops rotating, just like you asked it to. As
an example, if you’re in a stable hover when the wind gusts,
the gyro will automatically fight to prevent the wind from blowing
the tail around downwind (“Weather-veining”). If you
increase or decrease throttle, the gyro will automatically try to
keep the tail from swinging around due to the reactive torque from
the main rotors.
A bit of history: “Gyro” is actually short for
“gyroscope”… the same instrument you might have
played with as a kid in the form of a top, or used in physics class
to learn that a spinning object “wants” to maintain it’s
orientation, and will expend rotational energy to do so. Traditional
helicopter gyroscopes actually had a motor-driven spinning flywheel
weight surrounded by bump switches to detect when it’s
orientation was changing. This was an unreliable, slow, and heavy
device, but far better than manual rudder control. Modern gyros are
lightweight piezo-electric force gauges with no moving parts, and a
bit of computer intelligence that allows for a really cool function
called “Heading Hold.” Not all gyros have a Heading Hold
mode, but it’s a shame to use a gyro without HH mode on a good
helicopter.
Because the gyro is now a small
computer, it can not only know that the gyro is moving, but how fast
and long it’s been moving. This means it mathematically
integrates the simple rate changes over time, and because it can keep
track of all these changes, it knows “where it actually is”
vs. “where it should be” according to what you’ve
told the helicopter to do. As a result, when the servo fails to
react fast or powerfully enough to overcome an undesired motion, the
gyro knows it’s not where it should be and continues to adjust
until it achieves the original position. This means any time
you’re not telling the helicopter to rotate, HH mode remembers
the last commanded heading and will aggressively attempt to bring the
tail back to the saved heading, regardless of how long it has to work
to get there. The HH mode has a signal gain setting that is
controlled (the amount of gain) through channel 5 of the receiver.
The gain value sets the motion sensitivity of the HH mode. Too little
gain, and it won’t notice small movements that can still add up
to being off-heading. Too much gain, and it will see it’s own
corrections and fight itself trying to maintain a heading (resulting
in what is called “Tail Wag” when it overshoots
repeatedly).
What is Drift?
Drift is a term Drift is a term used by pilots to describe the tail
wondering off from the center position when there is no rudder input. There are
a few things that can cause drift. First not all gyros are of the same quality.
Economy gyros are effected by voltage and temperature. As the battery drains
during flight, the gyro gain is changed internally. Once the gain reaches a
threshold it can actually induce drift. During setup, you can adjust the gain to
its edge, and you will notice the servo start to move on its own, and sometimes
it will move all the way to one end of travel just sitting there. This is why
you will be asked to adjust your gain until you experience an aggressive tail
wag, then back off the gain just enough until it stops. This will give you
enough margin to keep it from reaching the low voltage threshold where drifting
starts. Temperature effects gyros as well. If you fine tune your gyro at one
temperature, and then (like the next morning when the temperature is different)
fly in a different temperature, you may either see tail wag or drift depending
on how the gyro electronics are effected by the temperature. It is a good
practice to let the gyro adjust to the current temperature before putting it
into flight. In other words, don't just run outside with your room temperature
gyro, and start flying in 50 degree skies. You will find yourself fighting for
tail control right off the start. Instead, take it outside, and give it ten
minutes to adjust to the temperature before flying.
Lets move on to adjusting the tail. Most of the tail
setup is done in Rate mode. However for the Gyro to properly initialize, we need
to start the model up in HH mode. We need to return to the configuration program
to assign the VR(B) dial to channel 5. This is done using the MIX settings (Fig.
17).
Select the MIX option, and select MIX 1 from the drop
down list.
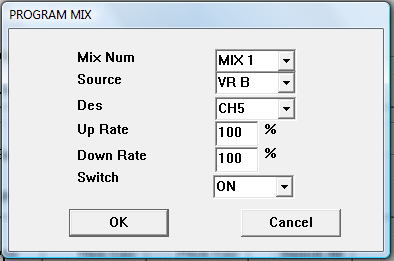
Fig 17ates, and the Switch
to ON.
Gyro Gain VR(B) Setup
There does not seem to be a standard on
which direction the VR(B) dial should be turned to set the gyro into
Head Holding (HH) mode, or Rate mode. I prefer that the HH mode is
obtained using a clockwise (CW) rotation, and other pilots prefer to
use a Counter Clockwise (CCW) rotation. The Blue Ray 450 RTF package
includes this radio, and it is typically setup to use CCW for HH
mode.
In some documentation on the Internet, the
instructor will tell you to set the dial to 10 o'clock and use CCW
to adjust the gain. Others such as this document will demonstrate a
method that will work on any FS-CT6A radio. Do not rely on
information stating you should set the dial to a specific clock
position. That position depends on the way the VR component is
installed, the type of gyro, and the reverse setting for channel 5
in the radio, and the reserve setting of the gyro itself.
The VR dials are potentiometers. This is a
Variable Resistor hence the abbreviation of VR in the manual, and
labeled as such on the radio. Some FS-CT6A radios have the VR dial
installed with the halfway point (dial position indicator) pointing
straight up. Some have the indicator pointing to 9 o'clock for the
mid-point. Some may be different all together. Test your dial by
rotating it in both directions to find out the end points, and the
halfway point. The VR value at mid-point is the zero voltage
setting. At zero voltage signal, the gyro will be on the edge of HH
and RATE mode, and will typically default the gyro into rate mode
because there is no signal at the zero or halfway position.
To determine which direction your radio
uses to obtain HH mode, turn the dial all the way in one direction.
Then (with the throttle cut switch On – safety measure) turn
on the transmitter, and then plug the battery into the helicopter.
If the Gyro HH indicator (light emitting diode - LED) illuminates,
then you have found the direction for HH. If you do not like that
direction, you can change it very easily. Simply use the RESERVE
button in the program to change the CH5 check box, and set the
physical REVERSE switch (or dial) on the gyro. Those two settings
allow you to set the direction of VR(B) to your preference for HH
mode.
The remainder of this document will use
the CW direction for HH mode.
On the radio, turn the VR(B) dial to the
mid-point and then turn it CW 60 degrees (2 hour markers) to make
sure the gyro initializes in HH mode. You can also leave it at the
mid-point, then turn on the radio, and rotate the dial until the gyro
light illuminates, turn it 60 more degrees, and then disconnect, and
reconnect the battery so that the gyro initializes in HH mode.
zes in HH mode.
If you have attached the servo horn to
the tail servo, then remove it. Verify the tail linkage rod is not
binding, and can easily travel to both extremes available by the tail
slider. Set the Throttle Cut switch (SW-A) toward you to prevent the
motor from turning. Set the Idle Up switch (SW-B) to OFF away from
your. Left stick horizontal slider is centered, and the vertical trim
slider (on the radio) is all the way down.
Power up the helicopter. Let the Gyro
initialize, typically with a three beep signal, and the servo find
its center . Attach the servo horn at 90 degrees to the tail rod
linkage (Fig.18)
*Note - you can use the boom as your 90
degree reference since the tail rod linkage is supposed to be
parallel to the boom. Some servos such as the Align DS-520 (Fig. 18a)
need to be mounted at an angle, however the ball link is still 90
degrees to the boom.
Fig
18
Fig
18a
Hint: if you have a slow servo, then
using a longer horn will help in maintaining position. If you have a
fast digital servo then using a hole closer to the hub will help. The
horn and hole position should allow the servo to move the tail slider
completely against each side of travel without binding the servo.
Verify the servo horn does not come in contact with any part that
would result in a stripped servo gear.
Loosen the two screws that mount the
servo to the boom. Move the servo along the boom so that the tail
slider is slightly closer to the boom from center of the shaft. The
tail blades should have a slight pitch.
Snug up the rear mount screw so that
the servo does not move on the boom. Now we want to check for correct
movement direction. Some Gyros have a reverse switch, others do not.
If your gyro does not have a reverse switch, you will need to use the
reverse (servo) option in the program for channel 4.
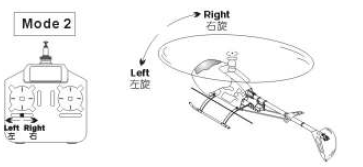
To determine if the servo is moving in
the correct direction, power up the helicopter, and apply slight left
stick towards the left. If the tail slider (looking from behind)
moves to the right, then it is correct. In other words, the tail
slider should move in the opposite direction as the radio stick. If
your physical arrangement is different than a TRex or clone, then
observe the tail pitch. The left stick controls the Nose of the
helicopter. With Left stick towards the left, it is responsible for
flying the nose of the helicopter to the left or CCW looking from
above the helicopter.
*Hint – To keep yourself oriented
between the radio controls and the helicopter, always fly the Nose of
the helicopter. NEVER fly the tail. This is a common problem for new
pilots. Using the left stick pushed over to the left should cause the
nose to go left CCW. Right stick with the stick leaning towards the
left causes the helicopter to slide to the left. When both sticks are
going to the left, you get a nice banking left turn with the tail
following the nose. When you start flying “Nose In”
(flying towards you), the nose orientation will be even more
important. So don't pick up a bad habit of concentrating on the tail.
Put your mind's eye in the nose of the helicopter (Fig. 18b)
Fig
18b
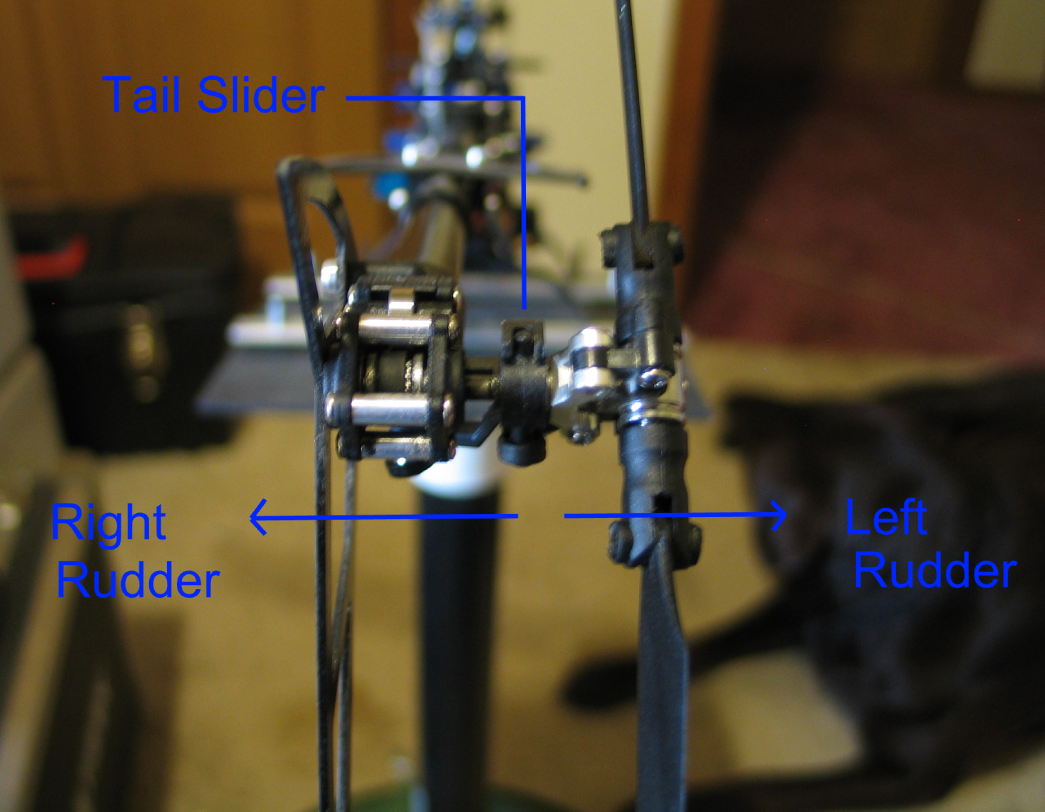
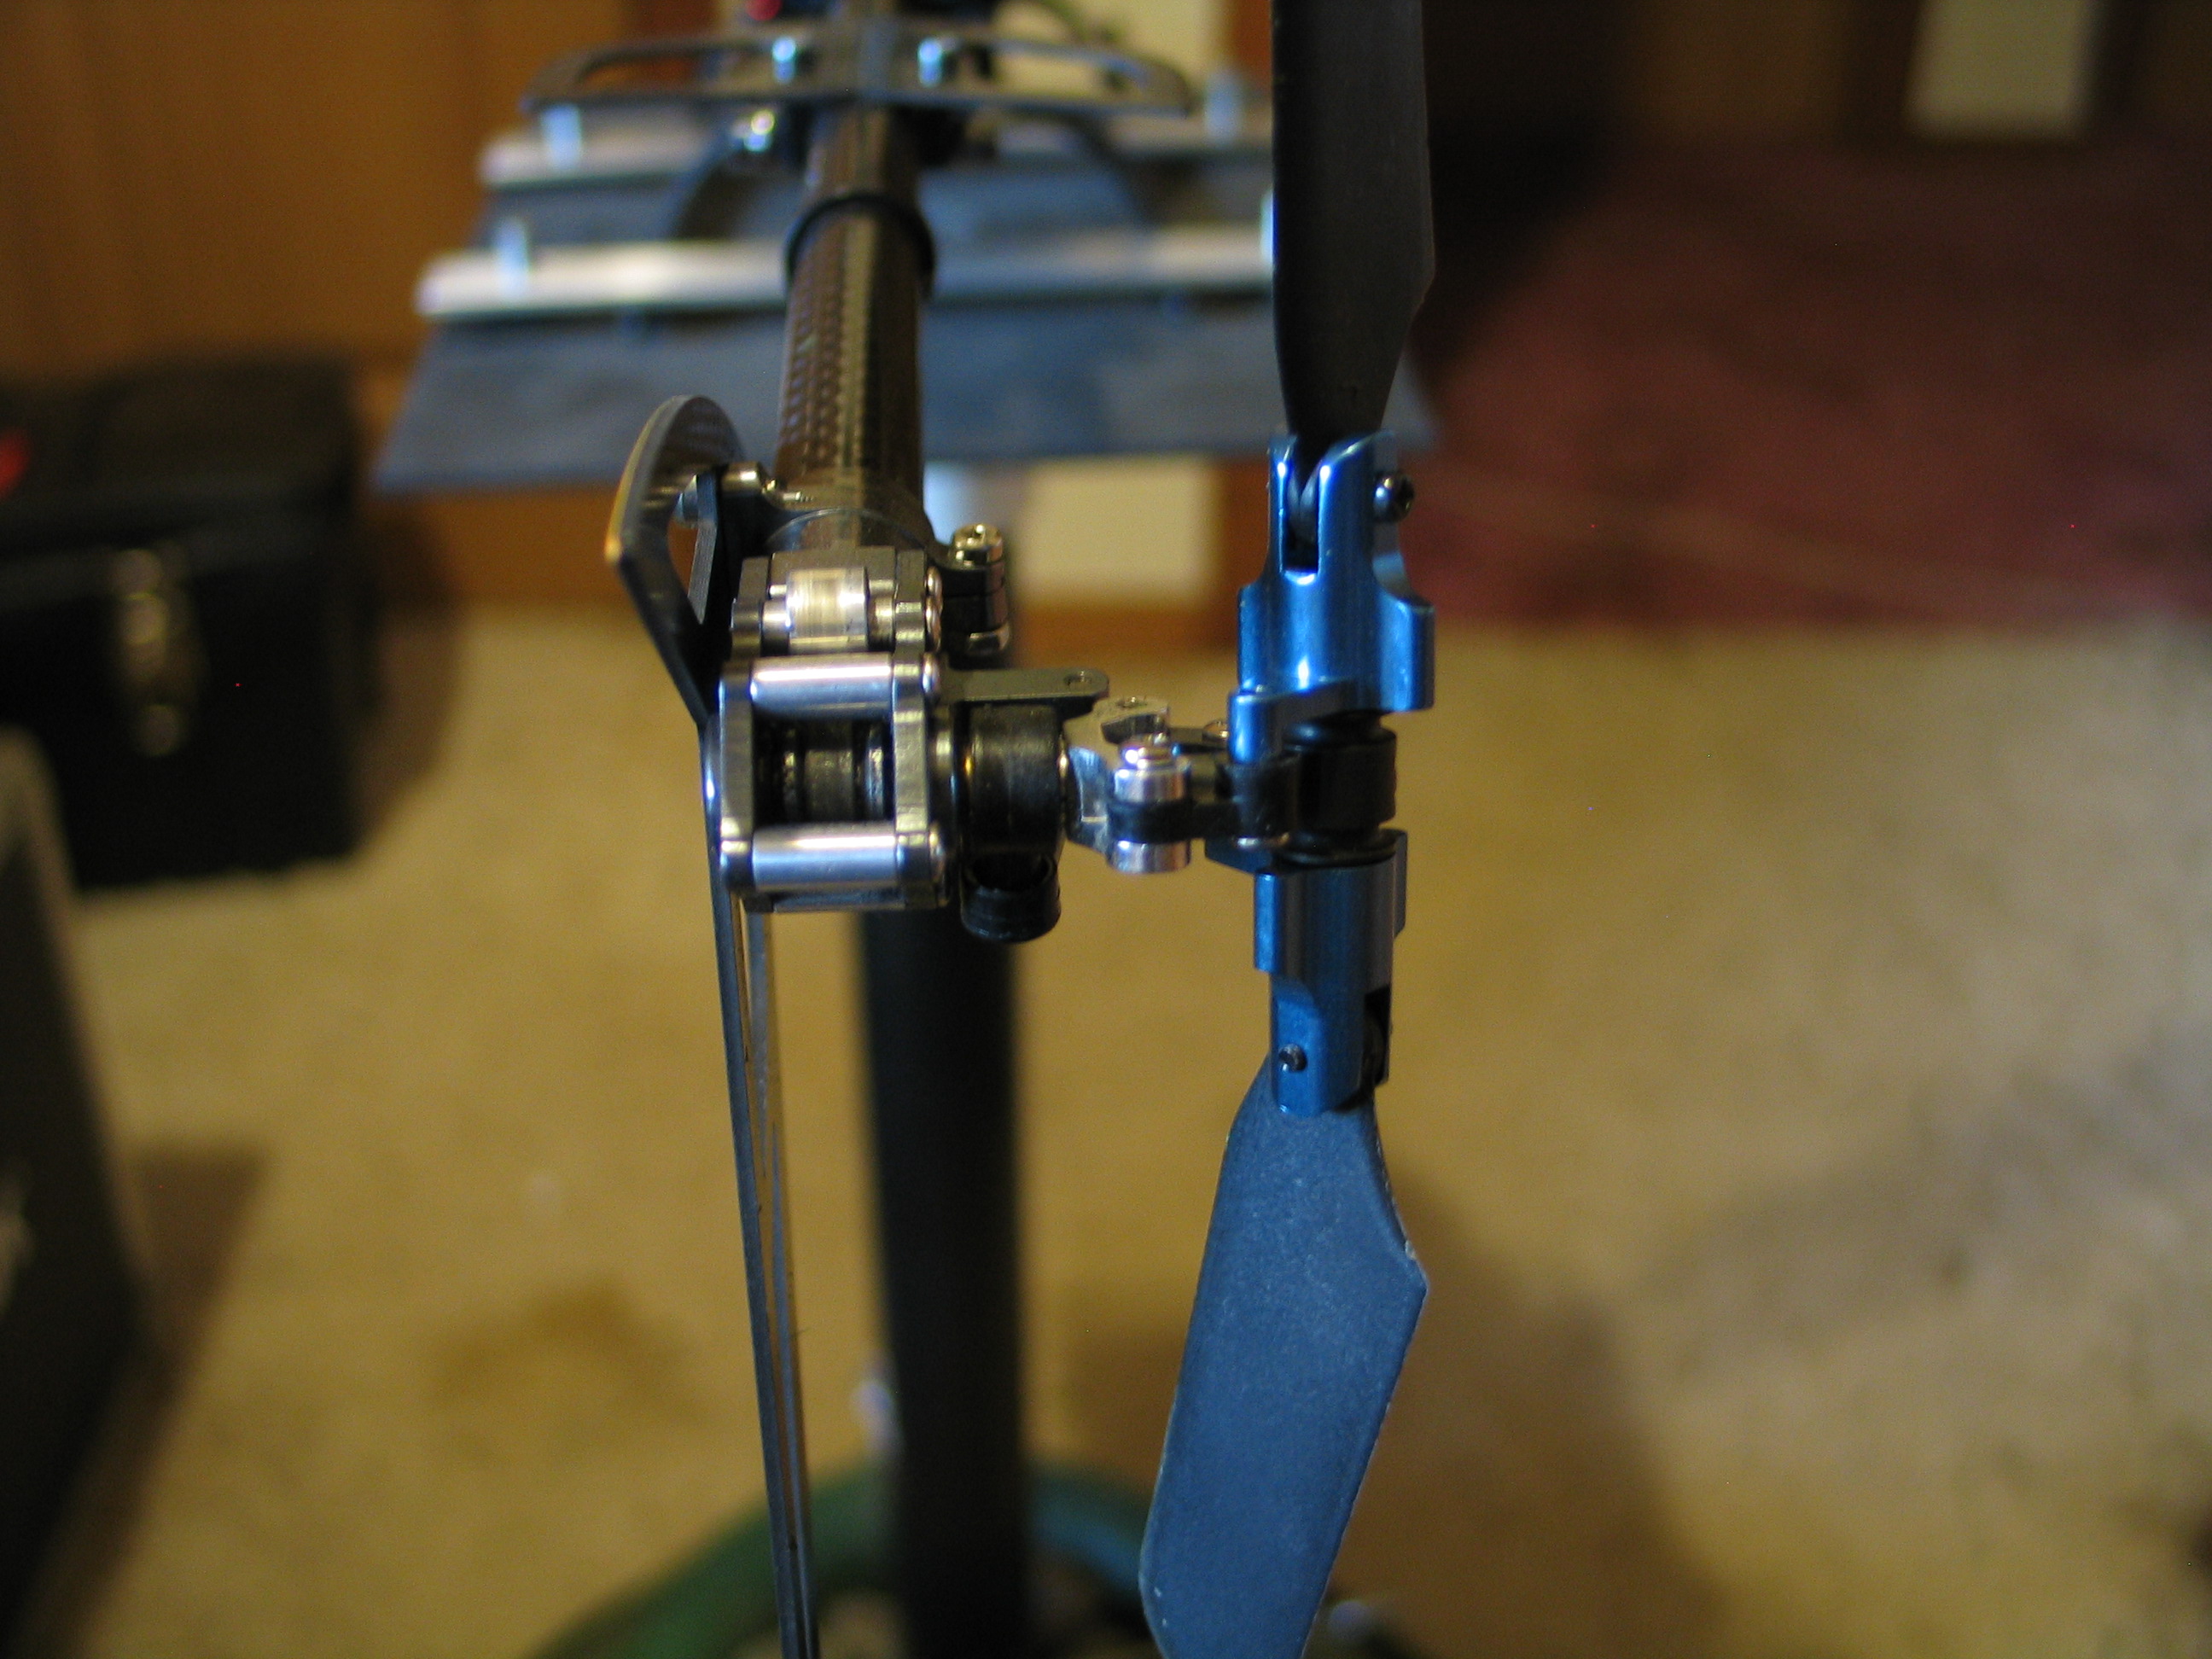
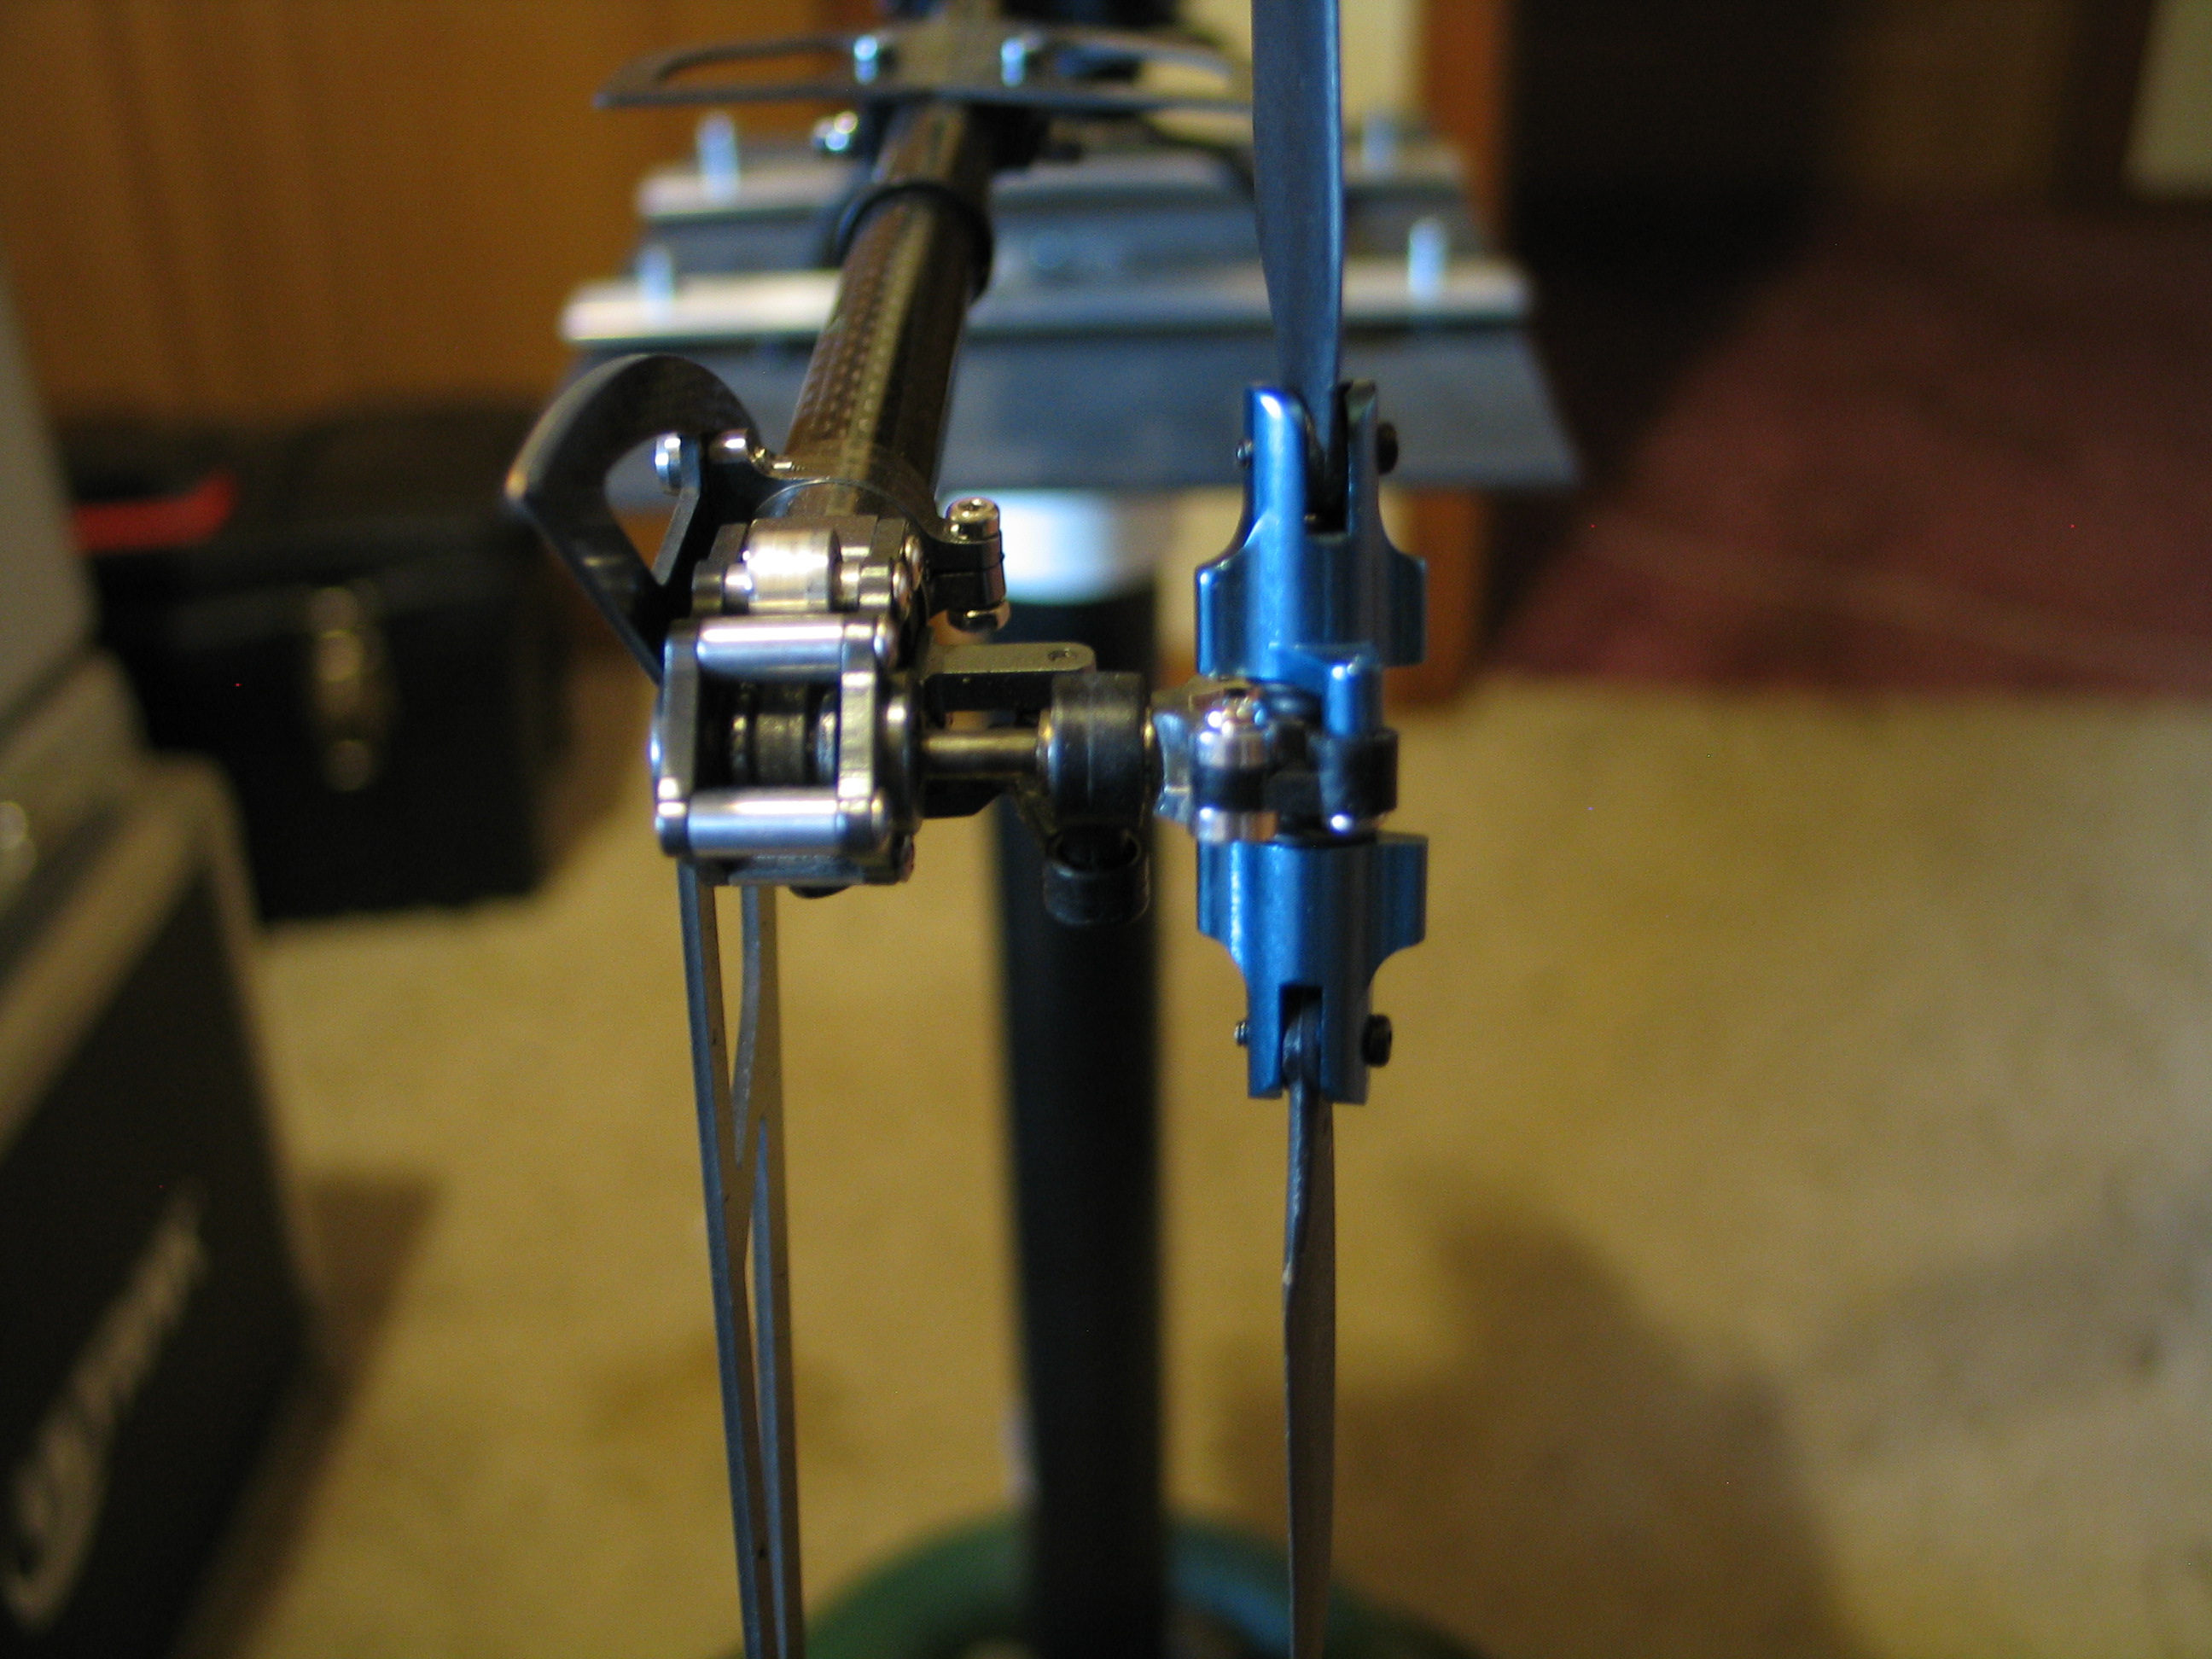
Fig 19
|
Fig 19a - Full
Right Rudder (stick right)
|
Fig 19b – Full
Left Rudder (stick left)
|
|
|
|
Prev
Next - Tail Slider Limits