Setting the Blade Pitch
In the next step we are going to set the initial blade pitch.
Select one of the blades as your reference blade. This is the one we
are going to get to zero pitch with the servo horns at 90 degrees.
Mark it with a dry erase mark, or a piece of tape. I typically have
to balance the blades, so one will already have the red weight decal
applied and that will be my reference blade.
With the blades attached. Set the radio Throttle Cut switches ON
(towards you). Power up the radio and then the model. Set the Idle Up
switch.
*Safety Reminder - it is much safer to keep the motor wires
detached during setup. Always turn on the radio first and wait for at
least 5 seconds. Always set the Throttle-Cut switch to On, and then
you may safely connect power to the helicopter.
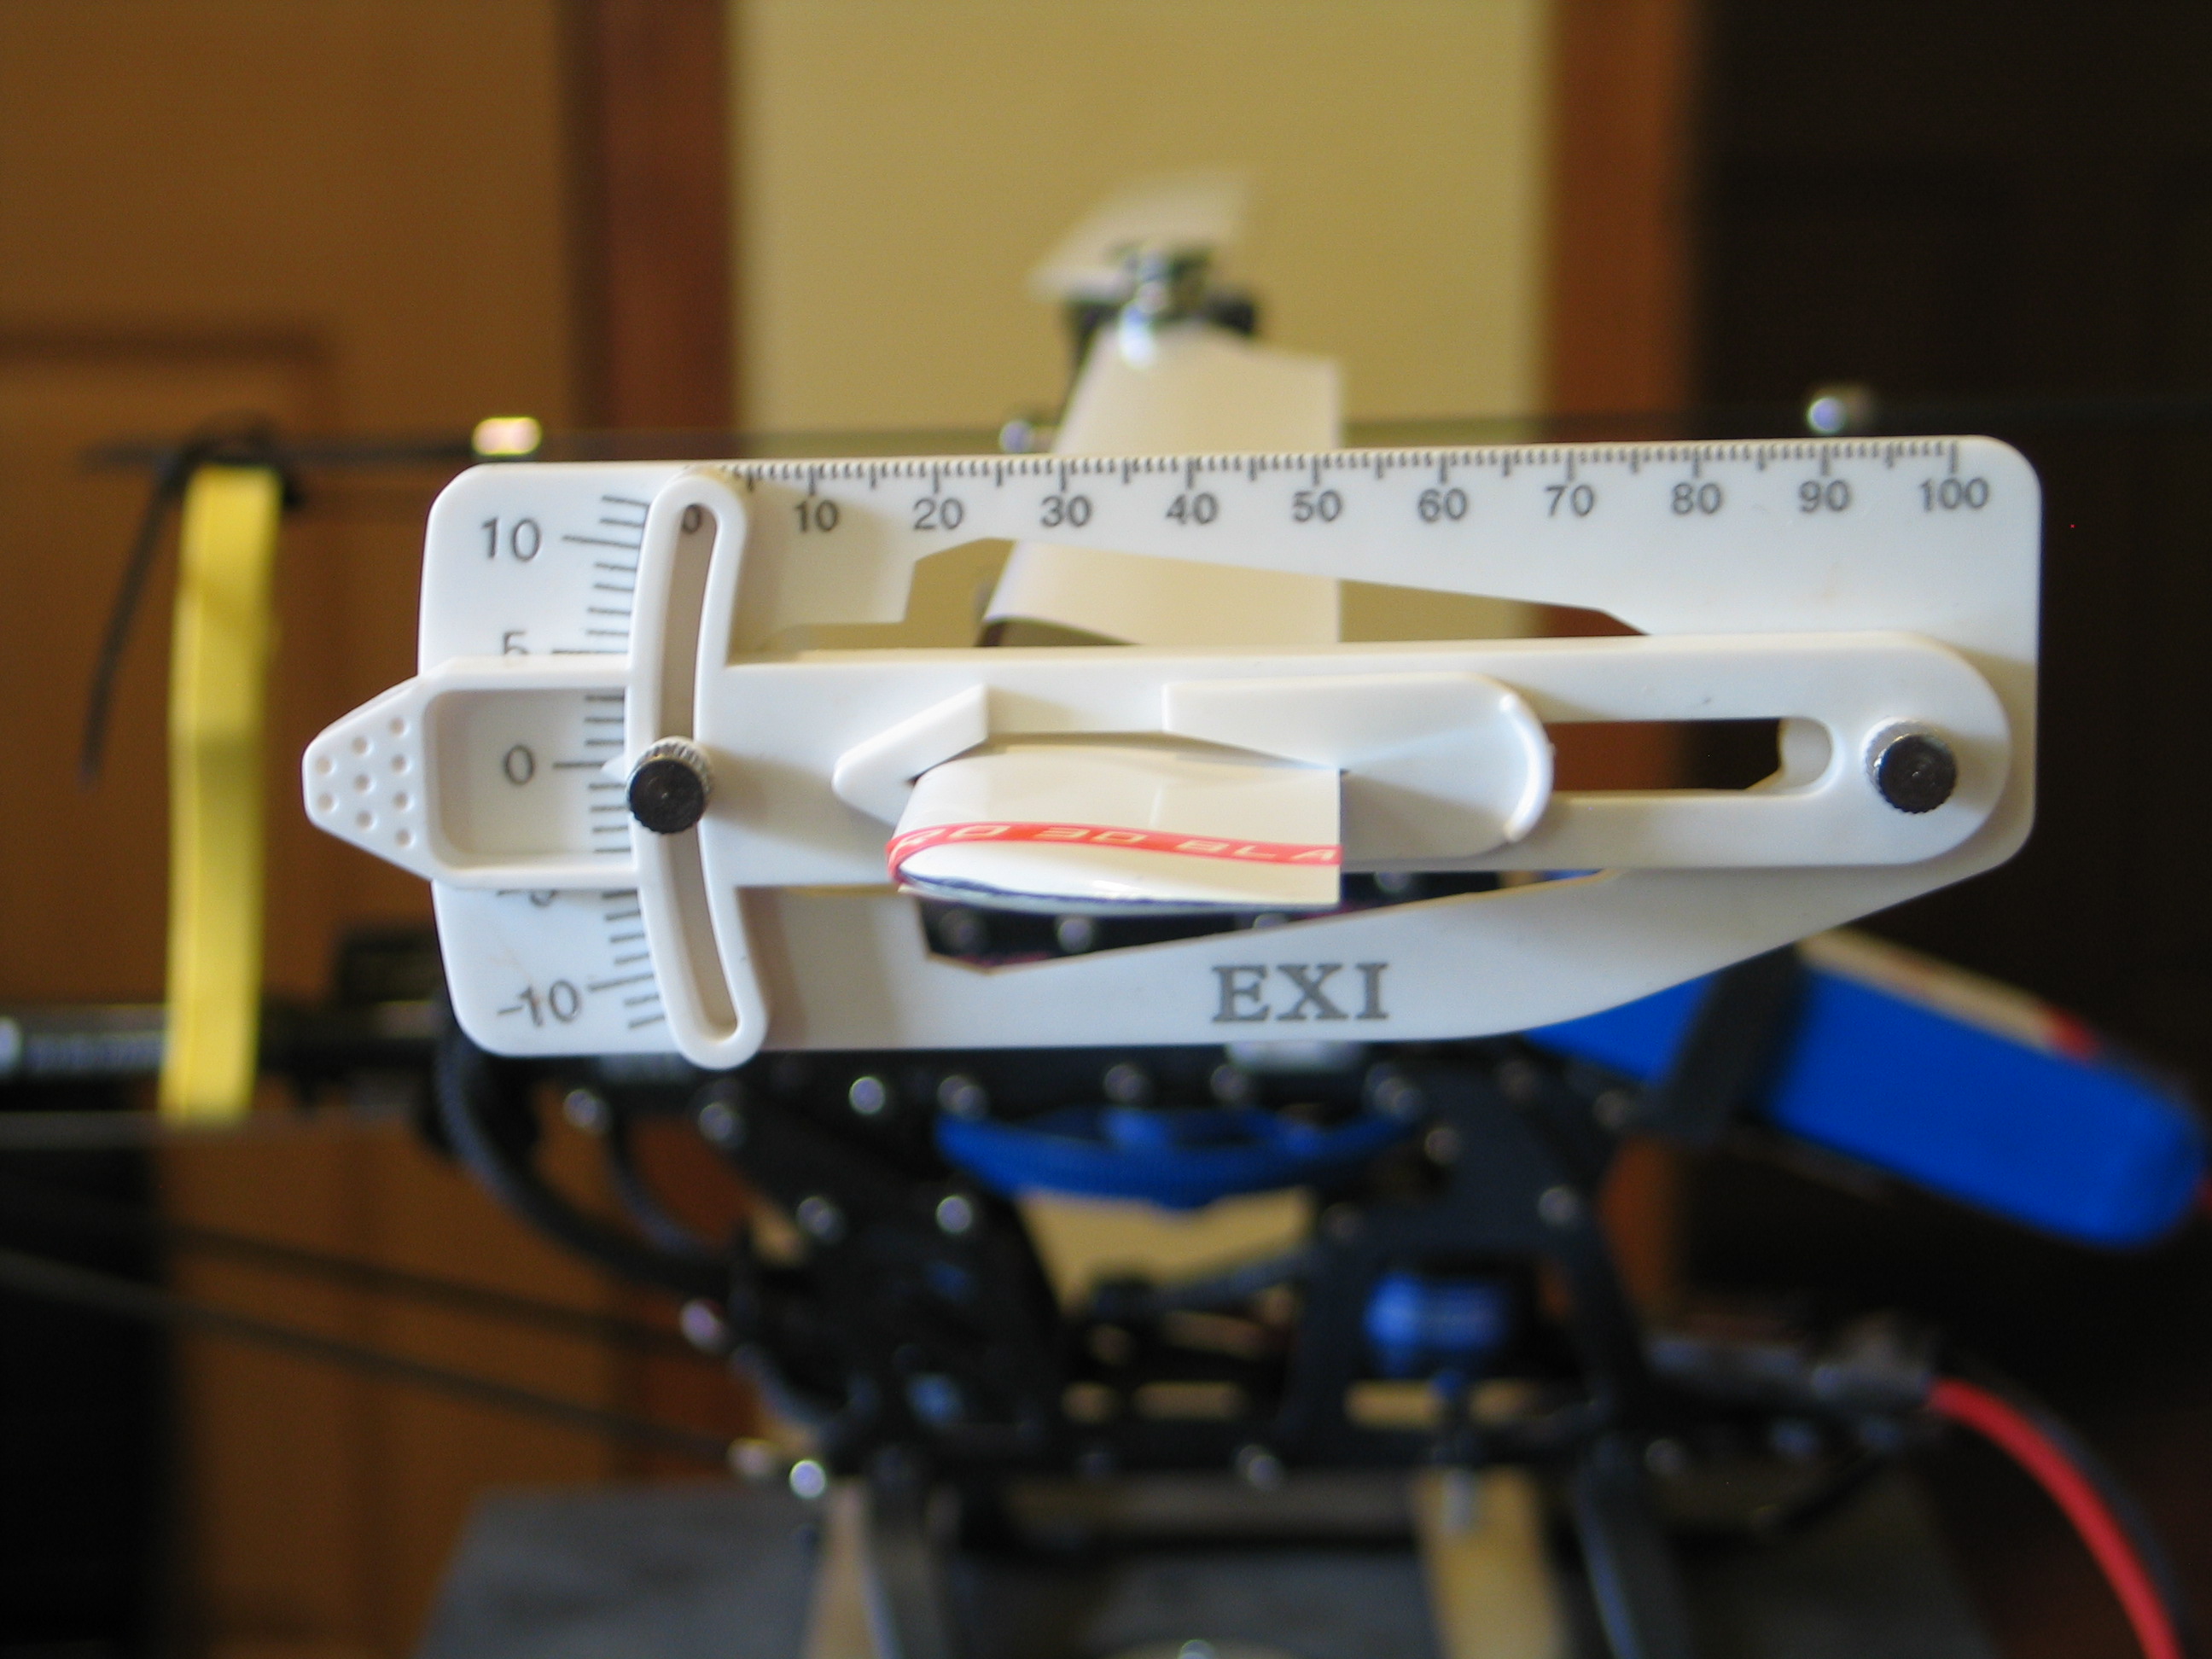
Power up the model and attach a Pitch Gauge to the reference blade
about 1 ½ to 2 inches from the end. You want to tighten the
gauge down on the zero setting. Make sure the fly bar is
perpendicular to the main shaft. Look down the blade and observe the
top of the pitch gauge as it lines up with the fly bar (Fig. 12). It
can be handy to use tie-wraps with a blade holder connected to the
fly-bar paddle to hold the fly-bar steady (see Fig 12a). This is
another area where the Idle Up pitch curve of 0,50,50,50,100 comes in
handy.
*Note – The Swash AFR setting has a range of -100% ~ +100%.
A Negative setting has the same effect as reversing a servo.
Fig
12
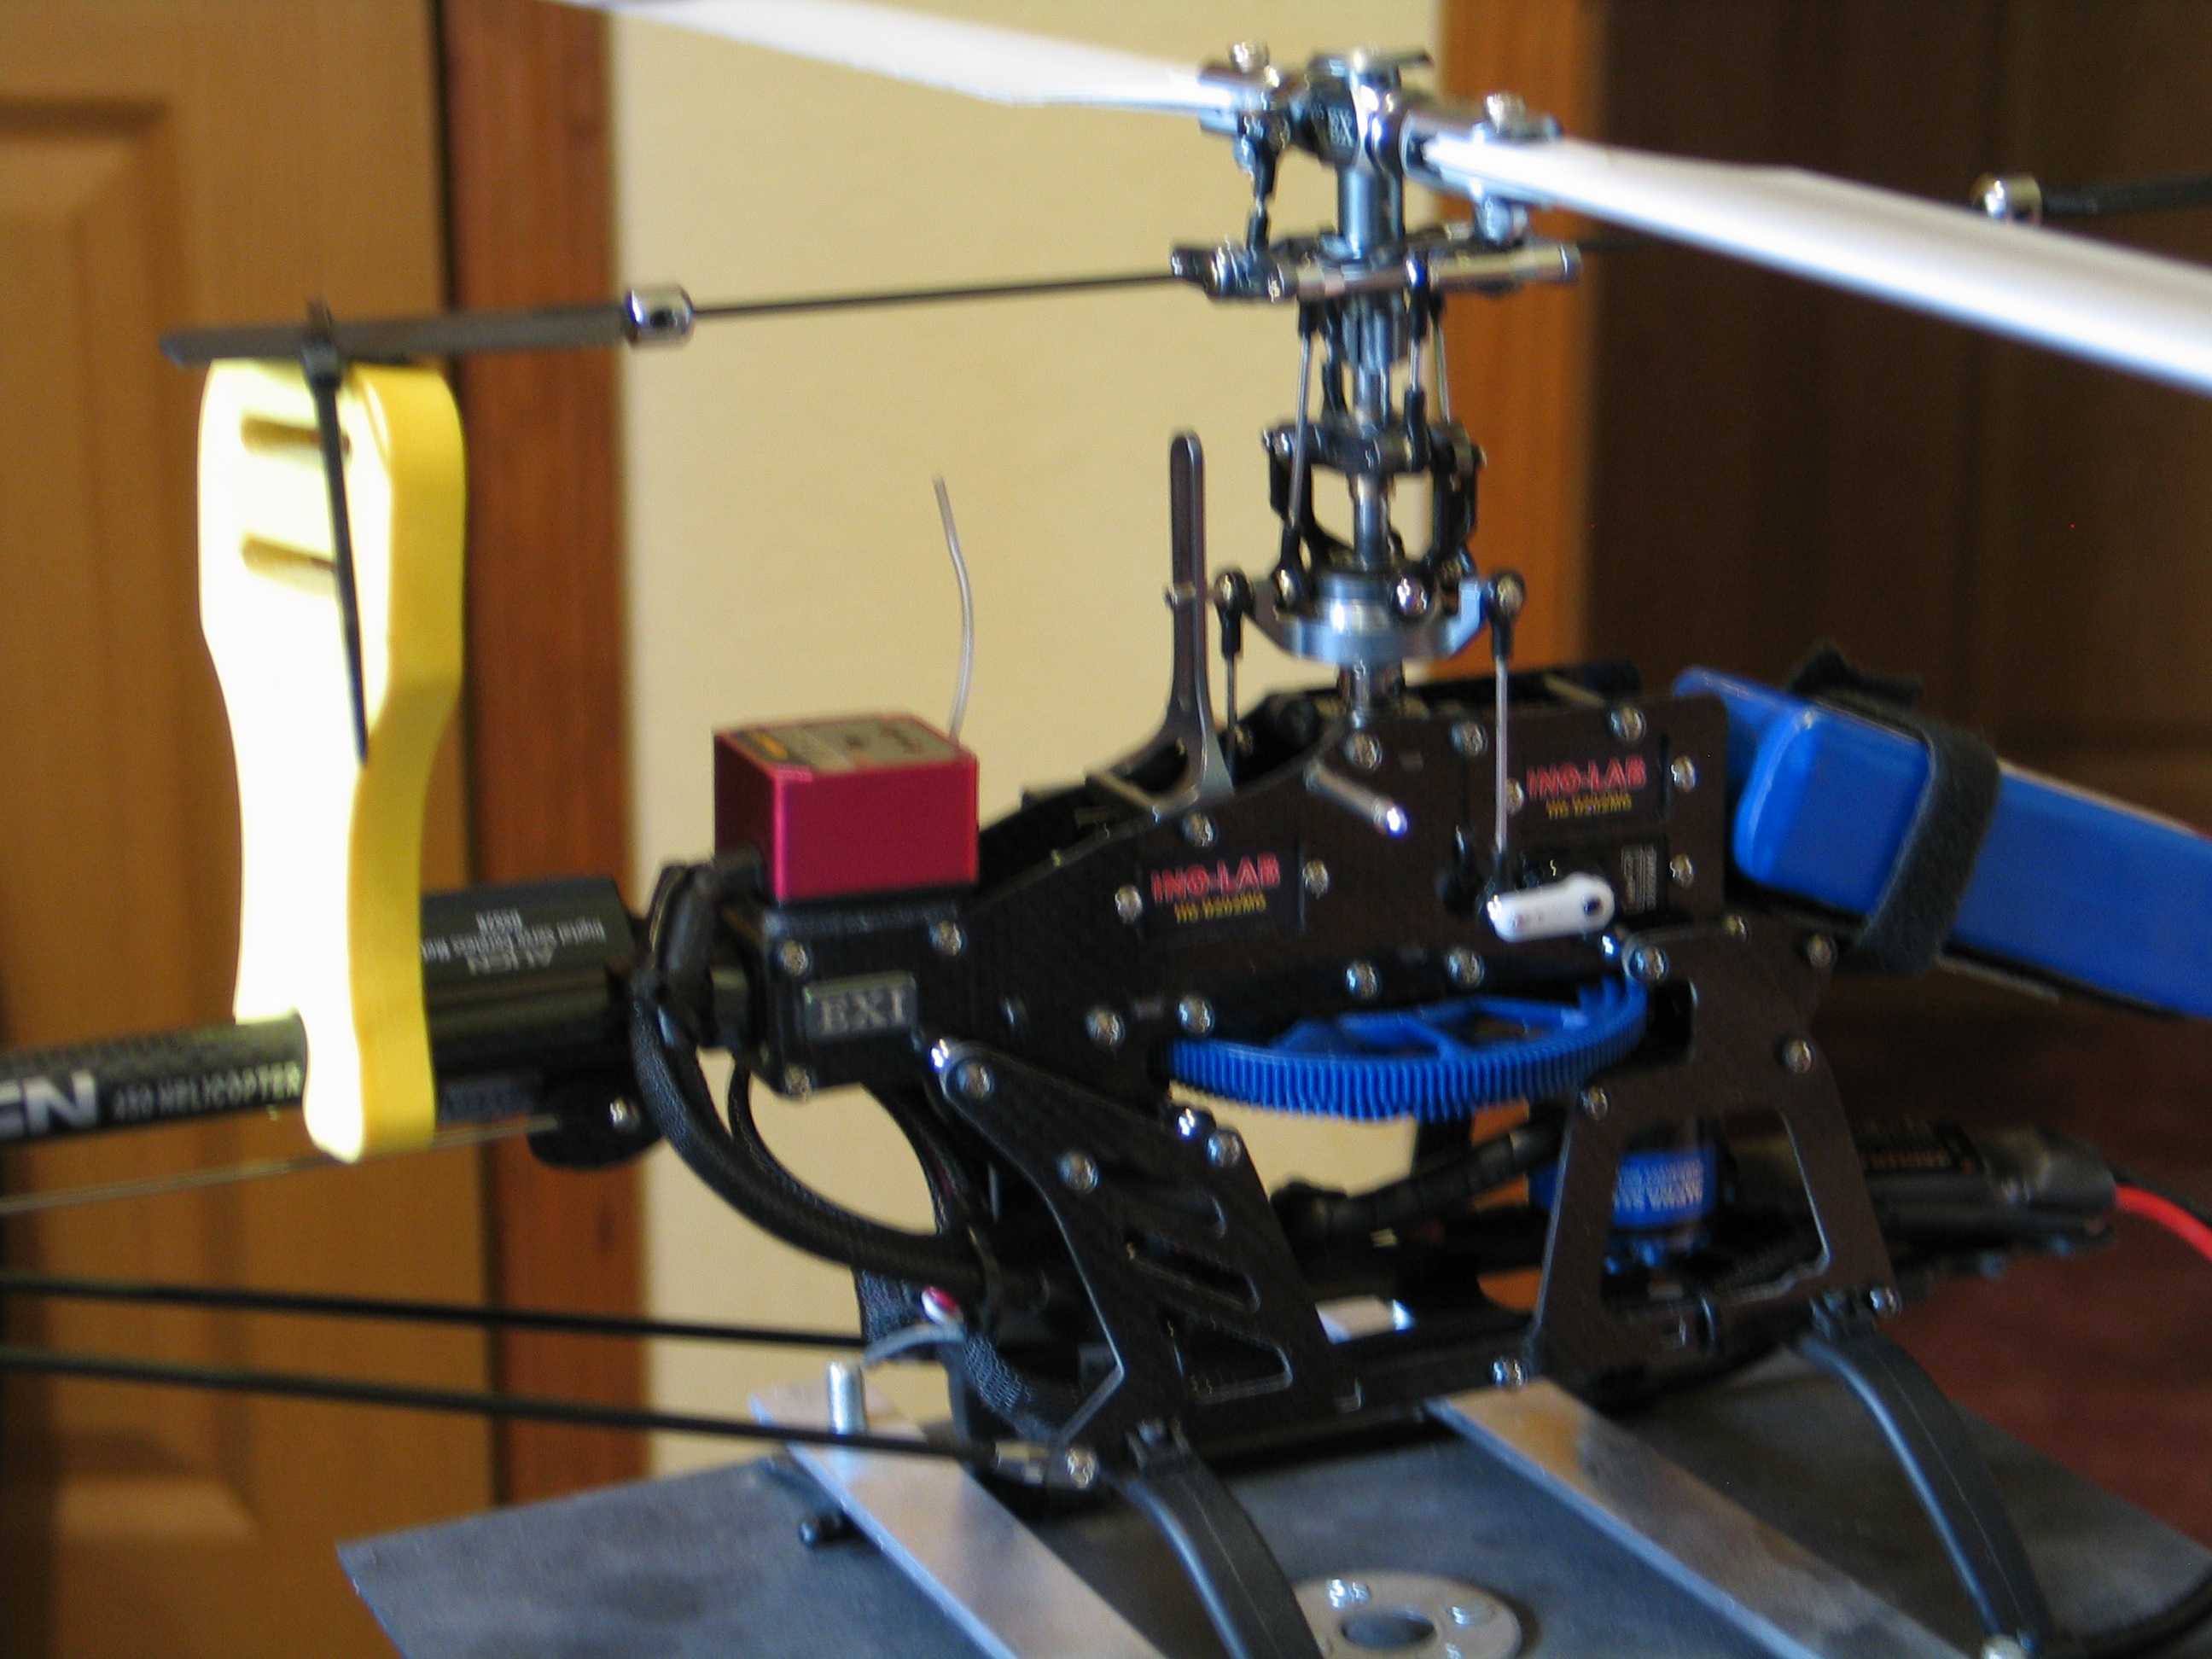
Fig
12a
If they are not lined up, then you need to adjust the top blade
grip to fly bar control lever link until you reach to zero pitch or
as close as possible. If you are real close, then you can use the
VR(A) dial to tweak it in, but only if it is real close. You do not
want to use up all of your VR(A) setting just to get to zero pitch.
The lower fly bar control level link is used for fine adjustments. It
is preferred to keep the VAR(A) dial close to 9 o'clock or mid way in
its potential travel.
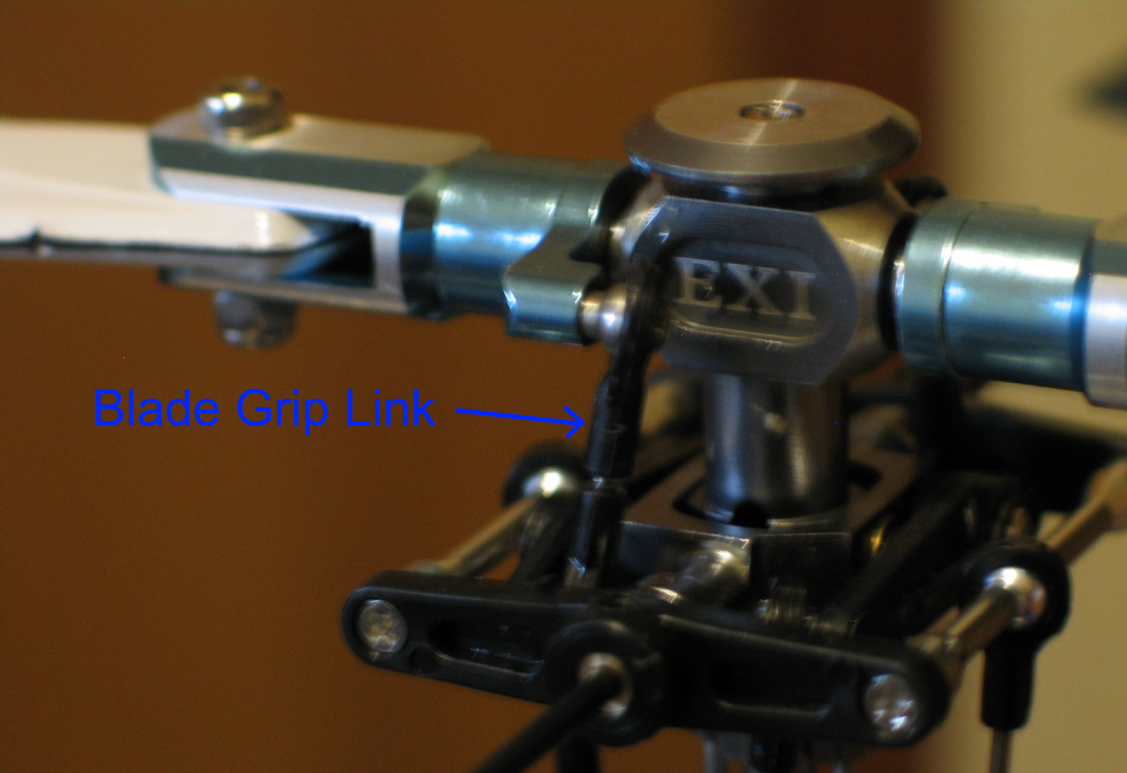
Fig
13
Test for zero pitch at multiple locations as you rotate the blade
a full 360 degrees. This is to verify your swashplate is properly
leveled. If you keep a constant zero degrees throughout the full
rotation, you can be certain that the swashplate is indeed level.
Now that the reference blade is at zero pitch, you can move the
left stick all the way to the top. Measure your pitch at this
setting. You do not want the pitch to be more than 12 degrees unless
you are a serious 3D pilot in which case you have a better radio and
are not wasting your time with this set of instructions. I typically
keep the total pitch at 11 degrees.
We will use the SWASH AFR setting to limit the upper and lower
pitch. The setting here effects both positive and negative pitch.
Typically on the EXI head, the SWASH AFR is set to ~83% to provide a
maximum of -11 and +11 degrees pitch. Your particular head assembly
may differ in the SWASH AFR settings. If the swash plate level was
perfect throughout the travel, then all three SWASH AFR settings
should be the same percentage. If not, this is an area you can
compensate a little by allowing slightly more travel percentage for
the lowest servo during the leveling exercise.
Everything so far in this procedure has been using the reference
blade. It is a good idea to check the pitch of the other blade at mid
stick for zero. It needs to be as close as possible to the reference
blade. In the blade tracking step you may be required to adjust this
blade, however if you get the two blades dead on, it greatly
minimizes the need to adjust your blade tracking.
If the opposite blade is wildly off pitch from the reference
blade, you need to check for out of tolerance parts. Typically the
main shaft will be the problem, however, a worn or weak set of
dampers (rubber o-rings in the head), a bent feathering shaft, or a
bent head can cause this offset.
Note: Dampers do wear out with use. Align makes a couple different
stiffness rated damper sets. I prefer the #80 dampers. Keep a couple
sets in your parts bin. Periodically check the dampers for wear. An
easy check is to lift a blade with your hand to see how far it picks
up the feathering shaft in the head mount. A health set of dampers
will only allow a small amount of movement. As dampers wear out, you
will notice blade tracking changes.
At this point you should now have -11 pitch at full bottom
stick and 0 at mid stick, and +11 pitch at top stick. Your AFR
settings have been set to limit the amount of pitch, and your VR(A)
dial is at or around mid point. You have removed the pitch gauge from
the blade.
Prev
Next - Blade Tracking